
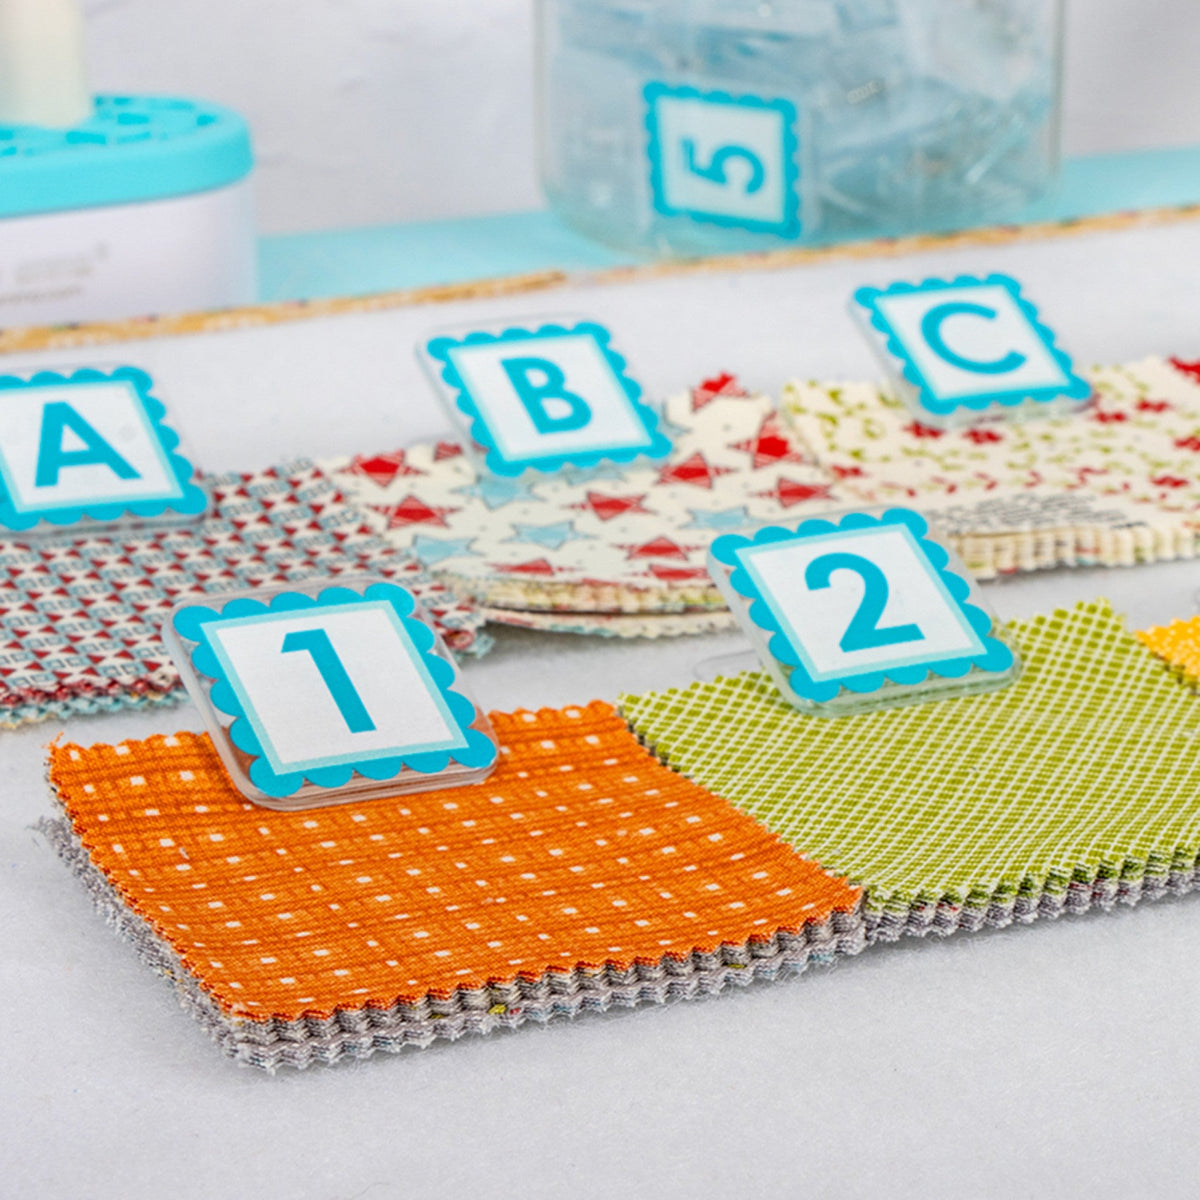
A 2 1/2 x 4 1/2-inch rectangle and a 2 1/2 x 5-inch rectangle of the same print are hard to tell apart on the table, and a stack of finished blocks gives no hint of which row each one belongs in. Many quilt patterns handle this with letters: the cutting chart names each piece A, B, C, and the assembly steps call for them by letter.
Here are six ways to label each piece, stack, or block from the cutting mat to the finished top.
Label at the Cutting Mat
Label each stack as you cut it, using the letter the pattern uses for that piece. The label then stays with the fabric, so you can set a project down for a week and pick it up where you left it.
For blocks, letter the columns and number the rows. Each block then has a position, such as B3, and you can sew the top together in the order you planned it on the wall or floor. If you put the label in the same corner of every block, it also shows which way each block turns.
Lettered Pins
The Gypsy Quilter's ABC 123 Cool Pins put the label on the pin itself. Each of the 104 purple pins has a hexagon-shaped head with a number from 0 to 25 on one side and a letter from A to Z on the other, so the set holds four of every letter and number. Because the pin goes through the fabric, the label stays with the piece when you pick up a stack or carry blocks to the ironing board.
The pins are 0.5 mm thick, and The Gypsy Quilter says they leave no holes in the fabric. The Gypsy Quilter rates the heads heat resistant up to 350°F, so you can press with a pin in place on a lower iron setting. The cotton setting can reach about 392°F (200°C), which is hotter than that rating, so keep the soleplate off the heads at that setting. The pins store in a heart-shaped case.


Markers You Pin On
Quilt Block Markers, made by Purple Hobbies for The Gypsy Quilter, work with the pins you already have. Each marker is a white plastic letter or number with a small loop at the top for a pin. The set has 36, A to Z and 0 to 9, one of each, in a clear heart-shaped case. This listing does not include pins.


Marker Squares That Sit on a Stack
It's Sew Emma's Alphabitties need no pin. Each is a small plastic square printed with a letter or number on both sides, so you read it based on the side facing up. You set one on top of each cut stack or at the head of each row. A set has 36 squares, A to Z and 0 to 9, one of each, in blue or pink.
Nothing attaches the squares to the fabric, so they suit stacks that stay where you sorted them. For a stack you will pick up and move, a pin or a clip works better.

Lettered Clips
A clip both holds a stack together and labels it. It's Sew Emma's Alphaclippies are clear plastic clips, each with a blue scalloped tile printed with one letter or number. The set has 36 clips, A to Z and 0 to 9, in a reusable box, and each clip measures 1 1/8 x 1 1/4 inches.


Sewing by Sarah's AlphaClips Mega are white clips with a 1 1/4-inch square face that carries one large black letter or number, 36 clips from A to Z and 0 to 9. Sewing by Sarah makes them for organizing while you cut and piece, and notes that they don't replace pins for holding pieces together while you sew.


Color Clips for Groups
Some projects require you to make groupings, separating one fabric from another, one block type from another, or each person's blocks at a group sew. It's Sew Emma's Quiltyclippies are the same clip style as Alphaclippies, but they have a small quilt-block design instead of a letter. The set has 36 clips, six each of six designs in green, aqua, navy, red, pink, and gold, and each clip holds up to 30 layers of fabric.
Six colors make six groups. For more than six groups, or groups in a fixed order, use Alphaclippies. The two sets use the same clip, so you can mix them in one project.


Writing the Label on the Fabric
A label written on the fabric stays with the piece all the way to the machine. Write the letter in the seam allowance with a fabric marking pencil in a color that shows on the fabric. Once you sew the seam, the seam allowance sits inside the quilt and the letter does not show.
The Bohin mechanical fabric marking pencil has a 0.9 mm ceramic lead, and its marks wash out or erase with a fabric eraser. The pencil comes with white lead, and refills come in white, gray, pink, yellow, and green.
Laying Out the Blocks
A design wall shows the whole layout while you decide where each block goes. The Gypsy Quilter's Center Stage design wall is 72 x 72 inches of white felt, and cotton blocks cling to it without pins. When the layout is set, label each block by column and row before you take it down, and take a photo of the wall to check the top against as you sew.
The Bottom Line
- For pieces you will press or carry with the label on, use lettered pins.
- For a label on the pins you already own, use pin-on markers.
- For stacks sorted on the cutting table that will stay there, use marker squares.
- For deep stacks you will move, or a project that will sit for weeks, use lettered clips.
- For a few groups instead of a sequence, use color clips.
- For a label that stays until you sew the seam, write in the seam allowance with a fabric pencil.
Whichever you choose, label at the cutting mat with the pattern's own letters, and keep the label on the piece until you sew it.
Originally published January 26, 2024, as "Treat Yourself: Quilting Pins as a Valentine's Gift." Expanded November 1, 2026, to cover more ways to label quilt pieces, rows, and blocks.